Français
 Deutsch
 Italiano
 Português
 Español
How to Use the Network Scan in Supremo Console
The Network Scan feature allows you to monitor devices within a specified network range of a computer that belongs to a specific group.
This is particularly useful for managing and overseeing devices connected to your network and easily identifying all devices within a network range. Follow the steps below to configure and use this feature:
First, log in to your Supremo Console.
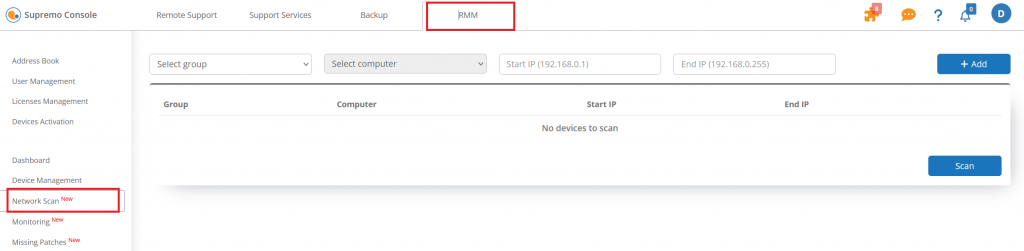
Next, from the left-hand menu, click on Network Scan under the RMM section.
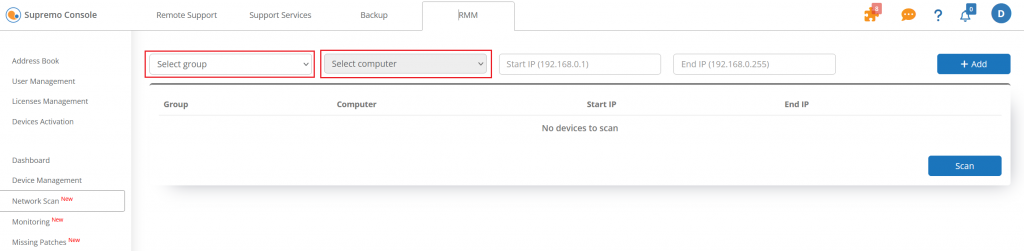
Then, from the Select group and Select computer dropdown menu, choose the group and computer you want to use for the scan.
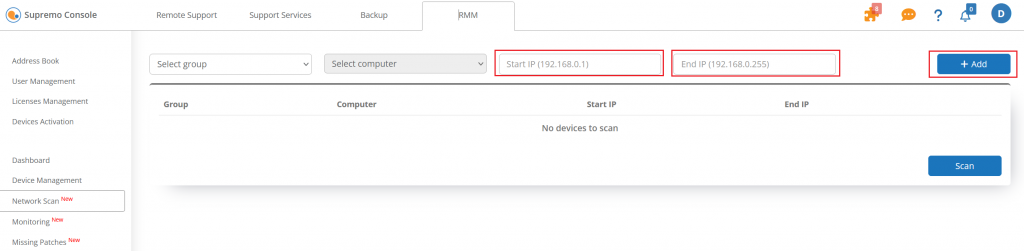
After that, enter the Start IP (e.g., 192.168.0.1) and the End IP (e.g., 192.168.0.255) of the network range you want to scan. This range should include all the devices you wish to monitor.
Click the + Add button to save your group, computer, and IP range settings.
Once the configuration is saved, click the Scan button to start scanning for devices within the specified IP range.
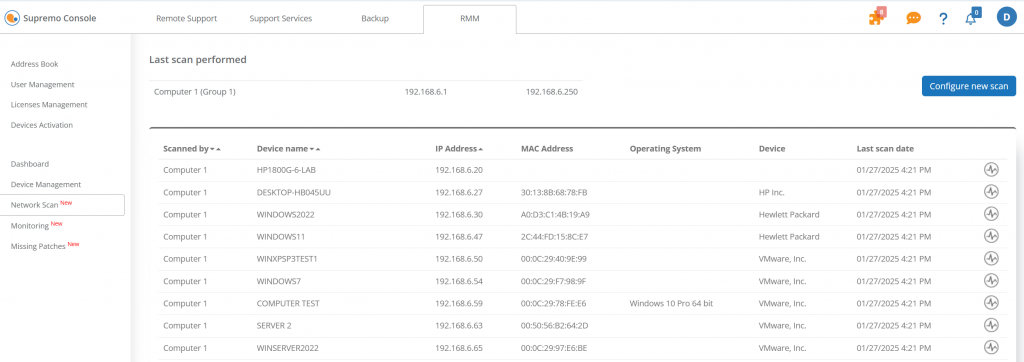
Finally, the detected devices will be displayed in the table below, including their details.